Norman Holtzhausen’s investigation into an oil leak led to a surprising culprit.
Since we could not find the cause of the problem, we booked the boat for a haulout. For a variety of reasons, it was nearly three months before we were allocated a space on the hardstand. When we started up the starboard engine to motor in we were horrified to discover the same problem on that side – low oil pressure and a bilge full of oil. Luckily it was a very short trip to the boat lift, so we topped up the oil then quickly motored over.
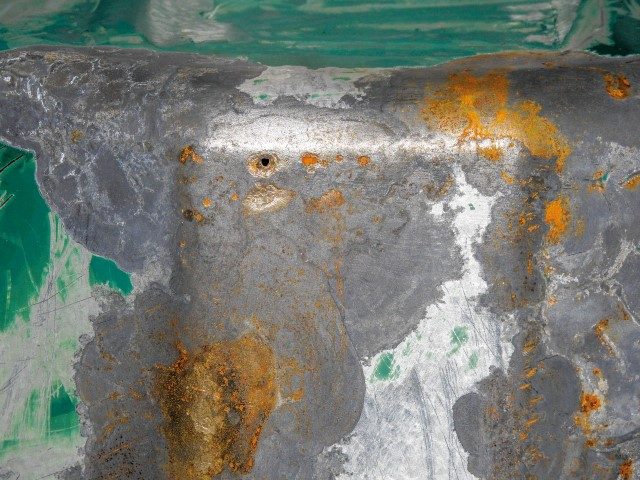
Once we had cleaned the mess and lifted the engines out we discovered an almost perfect pinhole had been eaten through both sumps in almost the same location. These Volvo D4-260 engines are only a few years old, and the sump pans were in other respects largely free of corrosion. When we showed them to Lachlan Trembath of Volvo agents Ovlov Marine, he said it was the clearest case of electrolysis he had seen in a long time.

The question was, how and why did this occur, and why on such relatively new engines?
Looking at the engine installations, at first glance everything looked as it should be. A stainless grounding strap made a circuit between the drive shaft and the aluminium part of the hull, and it looked like there was a good path from the battery negative (which is connected to the engine block) through the grounding strap to the hull, where the sacrificial anode on the outside makes contact with the surrounding sea water. This is referred to as bonding, and according to Warren Tait, General Manager of marine electrical specialists EAL Electric, in most cases all the major metal components of the boat should be bonded together. Anywhere there is a poor connection, especially between different metals like the castiron engine block and an aluminium hull, a current can occur which will rapidly result in corrosion at that point.
A closer examination revealed that the grounding straps were installed on the hull side of the flexible couplings on the drive shafts, and there was nothing on the engine sides. Since these couplings are made of a strong polymer plastic, it forms an insulator between the engine blocks and the rest of the drive mechanism. The engines themselves also rest on four large rubber engine mounts, further isolating them from the hull. There was no dedicated grounding straps connected to the engine blocks, which were therefore isolated from other metal parts of the hull and the sea water outside – except when there is water in the bilge.
The bilge pump has a standard float switch, which only kicks in when there is 5cm depth of water, and then pumps until the level drops to about 2cm. The trouble is that the lowest point of the sump is about 4cm above the bottom of the bilge. Over time a small amount of water collects in the bilge and this makes contact with the sump. We now had an electrical circuit from the battery, through the engine and sump, through minor imperfections in the paint coating on the sump which allowed contact with the salty bilge water, to the hull and out to the ocean.
Because the sump-water connection was imperfect, the resistance at that point caused current to flow and, over a period of under a year, corroded a small round hole through the lowest point of both sumps. This was now an expensive repair, since like most boats, the sump can only be accessed by lifting the entire engine out. And both motors developed the same problem within a few months of each other.
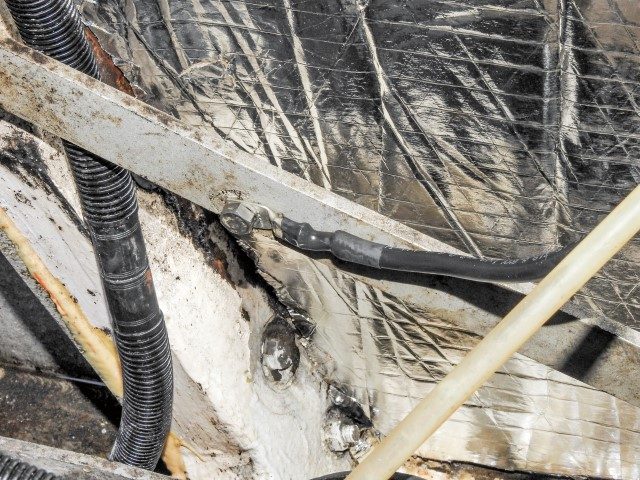
Repairing the sumps was the easiest part (after lifting the engines and removing them), with a specialist engineering firm TIG-welding a patch over the holes. The second, and most important, step was to implement a sturdy bonding strap between the engines and the aluminium hull. A piece of 70-amp, 10mm thick cable with two plated lugs ensures a good connection that won’t easily degrade. This was bolted to the engines on one end and to a crossmember on the aluminium section of the hull on the other.
The third step was to coat the bottom of the sumps in a layer of fibreglass, something Ovlov recommends. Trembath wryly observed that many boat owners, especially those who repower with secondhand engines, try to save money by not doing this before installation. The first time they have a leaking sump they tend to rapidly re-think this approach. This process provides a much more secure insulation layer than just a coat of paint, and not only prevents the electrolysis problem, but also reduces rust and other corrosion on the hard-to-reach sump.

Once we had the sumps back from the engineers we stripped off the remaining paint, used a wire brush to lightly scour the surfaces so the epoxy would adhere properly, and created a completely waterproof fibreglass shell over the outsides. Once this was dry, we then painted them the same Volvo green as the rest of the motor and re-fitted the pans to the engine blocks.
The final mitigation was to reduce the maximum level of water that can ever be present in the bilge. Older boats with worn seals and bearings will always get some water ingress, and unless we were absolutely diligent about cleaning this every time we went out it would likely recur. However, the depth of water present could be reduced by implementing an alternative sensing switch.
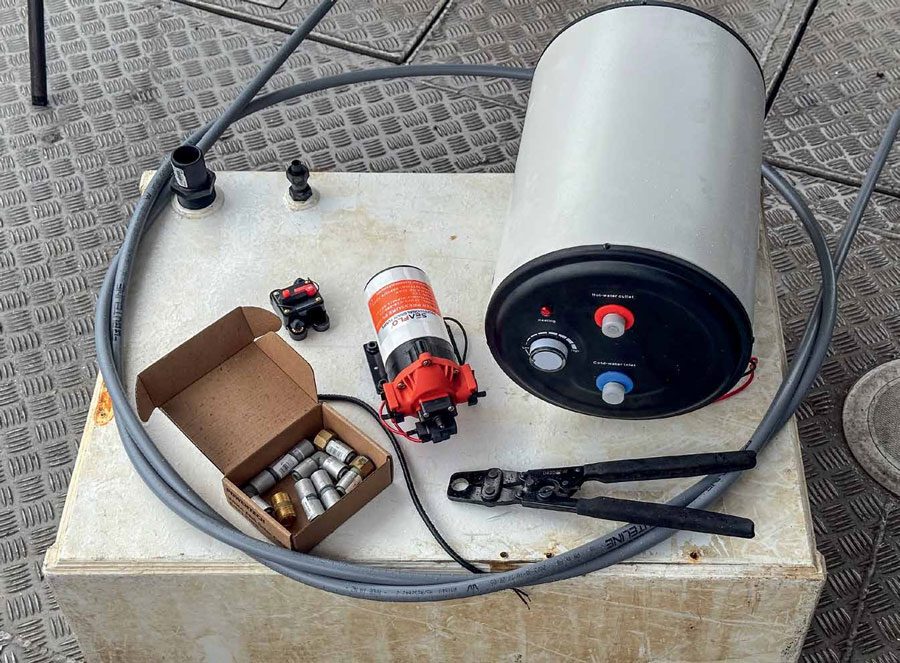
Some market research uncovered the Water Witch electronic bilge control, available from Marine Express in Rotorua. Rather than relying on a floating mechanical element, this unit has no moving parts and detects the presence of water across a pair of contacts. The manufacturers claim it works even if the water is contaminated with oil or dirt, and it triggers as soon as there is about 2cm of water.
This implies the bilge pump may kick in more often than with a mechanical float switch, but it ensures the net water level remains much lower. The Water Witch has a manufacturer’s seven-year warranty and comes in both 12v and 24v versions.
In the end we elected not to replace the existing bilge pump and float switch, but rather to install a second unit with the Water Witch controller. By positioning this at the opposite end of the bilge to the existing pump (and, coincidentally, closer to the lowest point of the sump where the electrolysis had occurred), we now have a system that will eliminate considerably more water than previously. We also have the peace of mind of two pumps, which mean we have no single point of failure and ensures the bilge level will always remain at a safe level.
Installing the new pump and sensor was easy while the engines were out of the boat. A suitable spot at the end of the engine bay was found, where the pump will not be obstructed by the engine but is also at the lowest level of the bilge. The Water Witch unit can be attached either vertically or horizontally, and for ease of installation we used a small wooden block to attach it to the hull. The Water Witch has a convenient wiring diagram printed on the side of the unit, and we wired it up using the same power feed to the existing bilge pump.

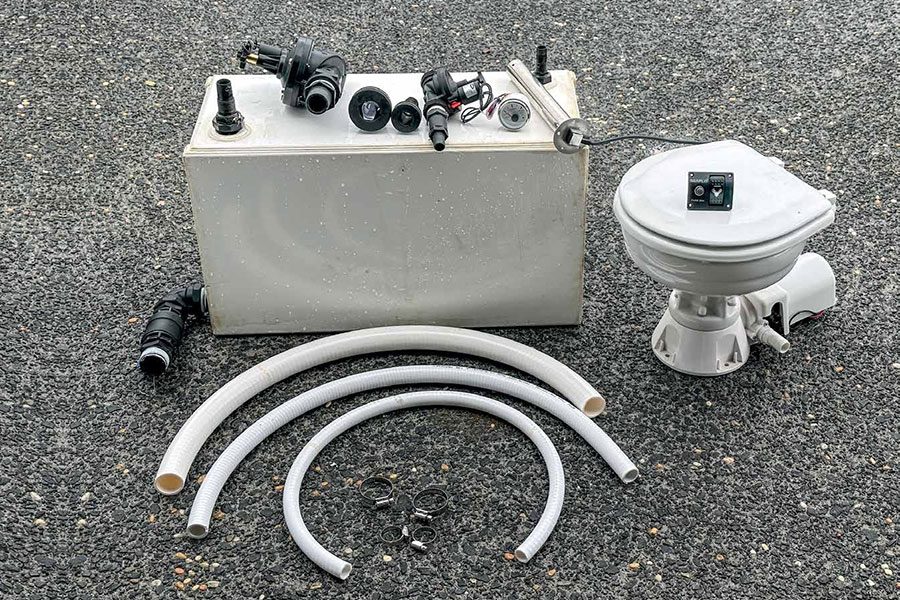
The last step was to fit a new through-hull fitting for the outlet and install a skin fitting in this. A 30mm hole saw was used to cut a hole well above the waterline but still below the cover of the engine compartment. The skin fitting was installed with suitable amount of Sikaflex sealant, and lastly a length of 19mm bilge hose joined the pump outlet to the skin fitting.
We tested the new pump setup and have confirmed that it keeps the water level to below 2cm in depth. An automatic delay in the switch keeps the pump running for 14 seconds after the water drops below the sensor level, and it has a builtin 8-second delay before kicking in. This prevents the pump cycling on and off as water sloshes around the bilge, and also drops the water level to below the 2cm which triggers it to turn on. Because the top of the pump’s water inlet is about 1.5cm above the bottom, there is also no risk of the pump running dry and burning out.
The boat goes back in the water in a few weeks’ time, and we look forward to never having this problem again!
SALT-AWAY CORROSION INHIBITOR
In addition to a a permanent solution, there are also options to help reduce corrosion which are simple to apply. One such product is Salt-Away, which acts as a corrosion inhibitor and can dramatically reduce the damage caused by water sitting in the bilge for a period of time. It is effective even in salt water, lasting up to 12 months at a ratio of at least 500:1, and in fresh water will last indefinitely.
Because bilge pumps always leave a bit of water in the bilge, adding a small amount of Salt-Away means you get lasting protection for a small investment. First work out how much water your bilge holds when the pump has got rid of the excess. In our case this was just over 10 litres. At 500:1 this worked out to 20ml of Salt-Away. However, this is the minimum ratio after pumping out excess water, so we added 50ml of the product. The light blue colour of the resulting water is a visual indication, and once this fades we will add some more Salt-Away.