Historically boats were built of wood, although various forms of metal (iron, steel then aluminium) became more common during the industrial revolution. The invention of fibreglass and epoxy resins in the 1930s added an exciting new material to the mix, and most boats are still built from one or more of these materials. They are easy to work with, well proven and cost effective.
More recently the concept of completely plastic boats developed, most commonly using rotationally-moulded polyethylene. This material is durable and lightweight, almost indestructible and requires no painting or finishing. As the technology matured it became possible to make bigger and bigger items, with boats over 10m long having been made in Australia. Currently the Mac 700GY (at 7m LOA) is the largest plastic boat produced in New Zealand.
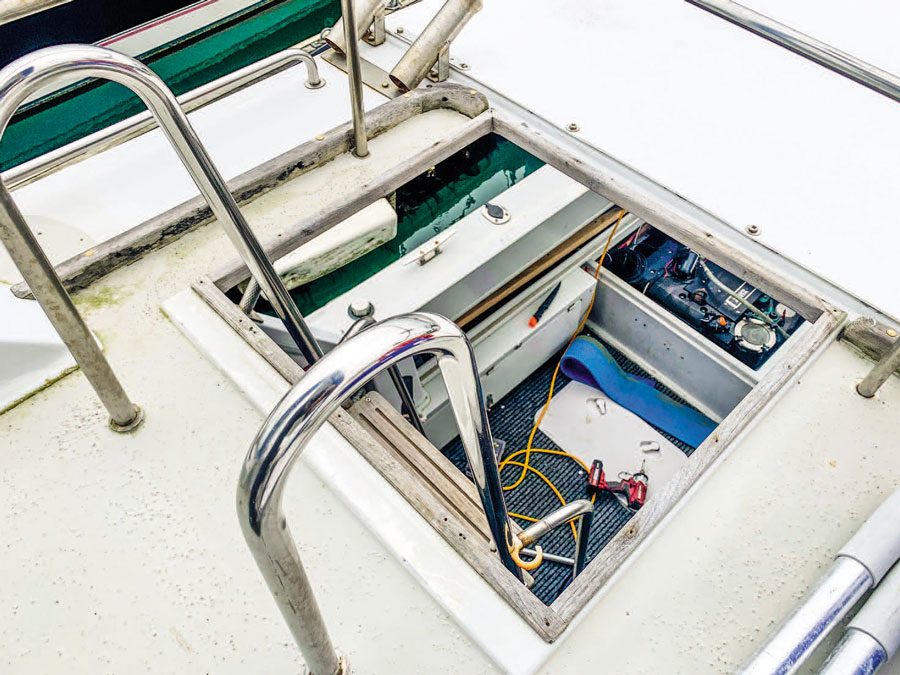 The problem hatch.
We have also seen 3D-printing technology being used to produce entire boats in plastic, although this technology is still radical and very new for boat building.
Although there is often some reluctance to do so, there is no reason why materials cannot be mixed on a boat. Aluminium hulls with fibreglass cabin and decks have been seen for quite some time, while hardtops and cabin roofs are often made of aluminium, fibreglass, or polyethylene. On a smaller scale, unless you have a ‘classic’ wooden boat, you will probably find that your hatch covers are plastic, regardless of the boat’s hull material.
 First welding attempt – no good!
For the DIY-er, making something with plastic offers some advantages: it won’t ever rot, it is cheap and never requires painting. However, there are some downsides too: plastic is harder to work with, unforgiving of mistakes (you can’t cover a botch up with some bog and a coat of paint!) and, at least in most homehandyman iterations, is not as strong as other materials. It is also slightly harder to source the correct materials, and there are many types of plastic which cannot be mixed or effectively joined together.
On a pre-lockdown trip out on the Hauraki gulf, carelessly leaving a hatch cover unlatched on my catamaran resulted in it swinging open while we were travelling at speed. The screws holding the hinges then gave way and the whole thing flew overboard. This was not noticed until we got back to the marina, and hence the cover, made of fibreglass, was lost. Since this was a custom size and shape for a 30-year-old fibreglass boat, there is no option to simply purchase a replacement. Something needed to be made.
 The speedweld nozzle on my heat gun.
And this is where plastic comes into play. While I could have made a hatch cover out of marine plywood and painted it, or similarly made a pattern out of wood and then moulded a fibreglass replacement, I decided to have a go at making it entirely out of plastic instead. Last year I had a new hardtop made for the boat with 10mm thick plastic-welded polyethylene, and this has been great. It is rigid, easy to clean and requires zero maintenance. Hence, I decided to have a go at making a replacement hatch cover using this same construction method.
The first thing to decide was what type of plastic to use. Obviously, I needed something that came in a rigid sheet, and since we were in lockdown my options were limited. I managed to find someone near me who had some offcuts of PVC sheet from a bathroom liner. This was just 1.5mm thick, which is definitely thinner than ideal, but it was all I could get.
 A bit of practice was needed, to get the speed and temperature right.
Other plastic options in normal times are acrylic sheet, readily available in clear sheets from major hardware stores, polyethylene (also called HDPE) and polypropylene. A quick Google search will show numerous plastic suppliers who can provide standard-sized sheets of a wide variety of plastic types.
PVC was probably the worst choice since it has the lowest melting point – potentially it could sag on a really hot summer’s day. However, any of the options would likely be adequate for creating a rainproof hatch cover. Acrylic and PVC can also be glued rather than welded – for most other plastics, finding a glue that will adequately adhere to them is almost impossible.

Unsupported, the sheet sagged.
The next issue is the plastic welding rod. This absolutely must be exactly the same type of plastic – different types simply won’t stick to one another. Therefore, you need to know the precise type of plastic before ordering the welding rod. Luckily, a plastic welding rod was classed as an essential item and I was able to order a roll online for contactless delivery. Of course, if you are buying a new sheet of plastic you can probably buy the welding rod from the same supplier.
And the last component required is a heat gun. Although you can buy specialised plastic welding guns which have a tiny heat nozzle, a cheaper option is simply a standard workshop heat gun with the smallest nozzle fitting that you can find. Even better, I had purchased a speed-welding nozzle at this year’s Auckland Boat Show. This fits to the end of a standard heat gun and allows you to feed the plastic welding rod into a slot as heat is applied. It also has a spine that enables you to accurately follow the nozzle down an edge or seam, producing a straighter weld.
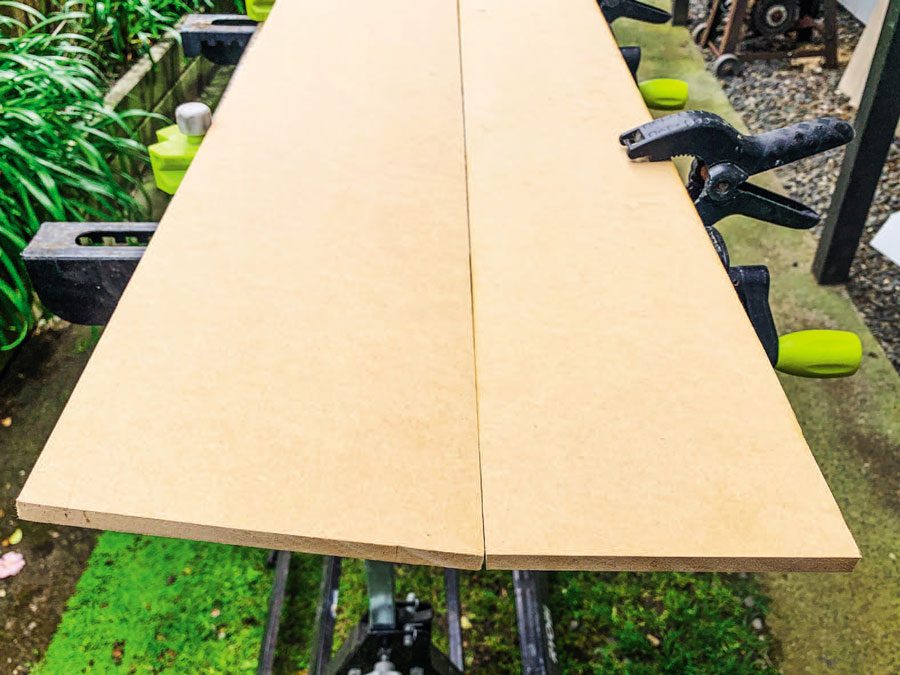 The MDF jig to hold the sheets at the right angle.
So, now I had everything to start. Since my hatch cover serves primarily as a rain cover, I wanted it slightly angled down from the centre so water would run off. I worked out the pattern and cut four triangles which, when joined, would create a slight pyramid shape. Initially I used a small electric saw to cut the PVC, but later discovered that multiple passes with a very sharp utility knife did a neater job. I stuck the pieces together with some tape, turned them over so I could make the join on the underside, and started to weld.
The technique required is to heat the two mating surfaces at the same time as the welding rod, and then push the now-softened welding rod into the soft underlying surfaces. This fuses all three together and forms a solid bond. The speed-welding nozzle does this for you, and you just need to feed the rod and move the heat gun forward at the correct speed, according to the degree of softness of the material.
 Clamping.
My first attempt was a complete disaster! The very thin PVC softened and sagged before it got hot enough for the welding rod to stick, and the adhesive tape melted and let go. In a couple of spots, I moved too slowly so the PVC charred. And when I tested my first weld it had very little strength! Time for a re-think, and a bit of practice before trying again.
The first critical change was that I needed to minimise the number of joins. Since the PVC was thin, I could crease it over a straight edge using the heat gun to soften it along the line. So my pyramid shape could be constructed from two pieces rather than four. This would give me just two joins.
 Closer clamping worked better.
In fact, I could have cut the whole thing from one big piece of plastic and only have a single join, but my pieces were not wide enough for the full pattern that this would require. Instead, I made two large triangular pieces, each with effectively two smaller triangles, and creased the join between them. And now I just needed to make one long join, in two shorter parts, to bring the halves together in the desired pyramid shape.
The second point was that I needed the thin sheet to be flat and fully supported when welding, to avoid it sagging as it got soft. Since the joints were not flat but rather at a slight angle this necessitated a jig to hold everything at the right angle while welding. Some scraps of MDF were cut and screwed at an angle onto a base board to hold these in the right shape. After about half an hour spent practicing my technique on scraps of PVC, it was time for weld attempt number two.
 The final weld – not too bad.
As the photos show, the second attempt was a lot more successful. I now had a good idea of the speed required, and there was almost no charring or discolouration. The weld was also much stronger, and when I flipped it over the top edge was reasonably neat, although far from perfect. There was still some warping along the second joint and the top side of that one also showed some discolouration. For the moment I decided this was adequate, but as soon as lockdown ends and the suppliers open up again I will re-make this with some 5mm thick sheet.
All in all, it has been an interesting exercise – low cost and with less work than it would have been to make out of wood. Now I have some practice and have my pattern worked out, it should take me about an hour to make the next version in thicker sheet. And the finished result should last forever – unless I again leave it unlatched and the blasted wind rips it off a second time… BNZ

Hatch cover installed.