One of the benefits of being a part-time boat reviewer is that from time to time I get to experience other people’s boats, and I get to see the latest technology and thinking in terms of layouts, components, and design features. So, when the opportunity came to redesign the interior of my own boat, I had a whole range of ideas to draw from. And nowhere more so than the galley.
Like a domestic kitchen, everyone has their own preferences for how they would lay out a galley. Thus, other users may have completely different requirements to me and ultimately might come up with a different design. But after more than 30 years of boating experience I had some strong ideas about what I would like to do.
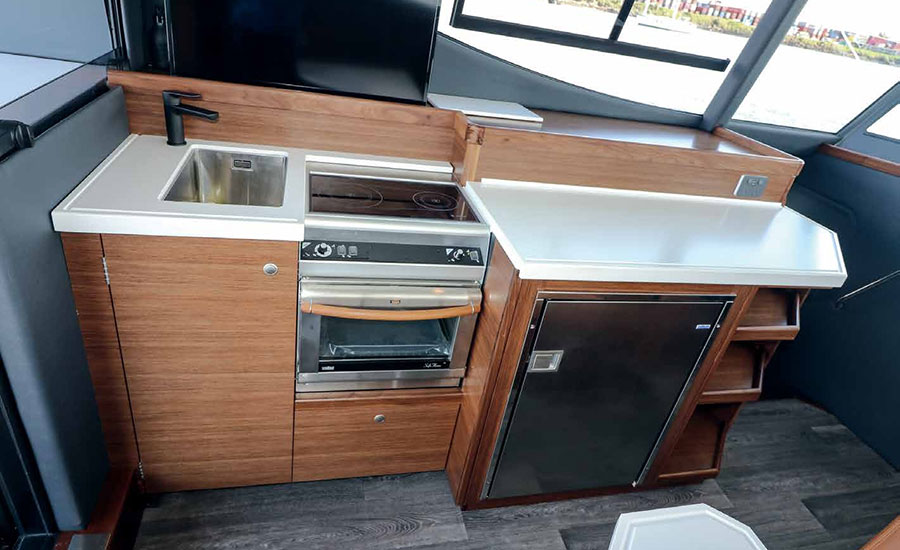
The first consideration was layout. In the restricted space of a boat, every inch needs to serve a function. And counter surface is king – I have never seen a boat that had ‘too much’ galley surface. And the best way to maximise flat surface while minimising space is a U-shaped counter. The chef (sometimes referred to as the galley slave – often the same person as the skipper!) has work surfaces on three sides, and merely needs to swivel at the hip to access everything.
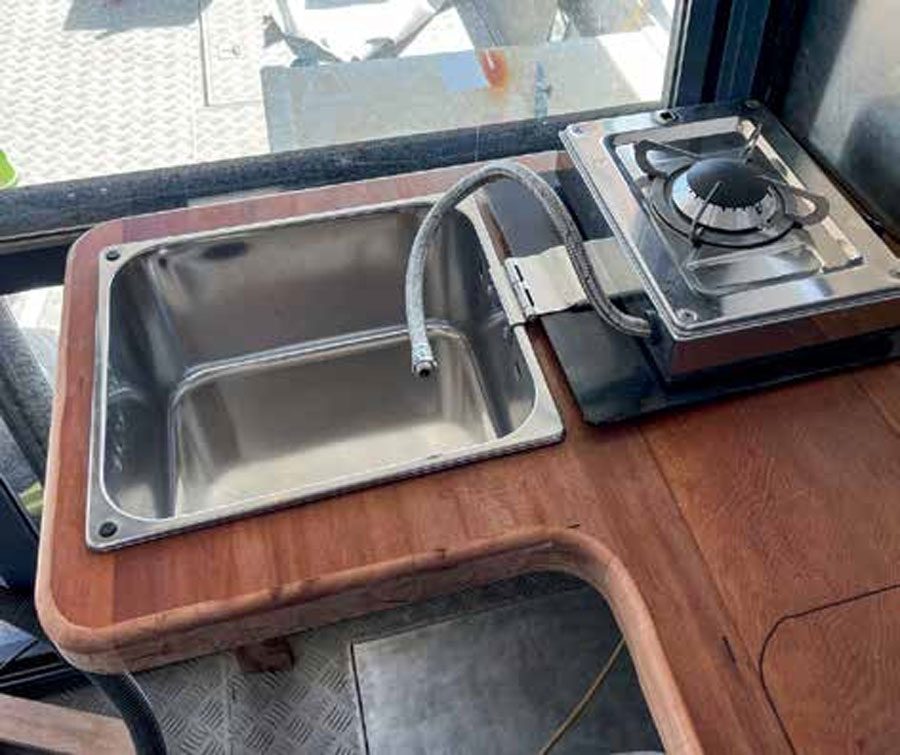
The second design feature is to minimise clutter on the countertop. Hence the sink needed to be recessed with a flip-top flush cover so it can also be used as a surface when not a sink. The hob needed to be similarly covered with a flush lid when not in use. Any oven needs to be under the counter and storage cupboards up against the ceiling or also under the counter.
My decision regarding the size of hob may be contentious. When I think back on all my years of boating, the number-one use of the galley is to make a hot drink – tea, coffee, or soup. Hence a hob that can heat a kettle is an absolute must-have. Beyond that, I have on overnight trips occasionally fried up some bacon and eggs. Before the recent ban on collecting scallops, I would also sometimes pan-fry a couple of these if we were overnighting in a bay. The rest of the time I bring partially pre-prepared food that may need heating but not usually complete cooking. And if I ever want a big cook-up, I can mount a gas barbecue on the stern rail.
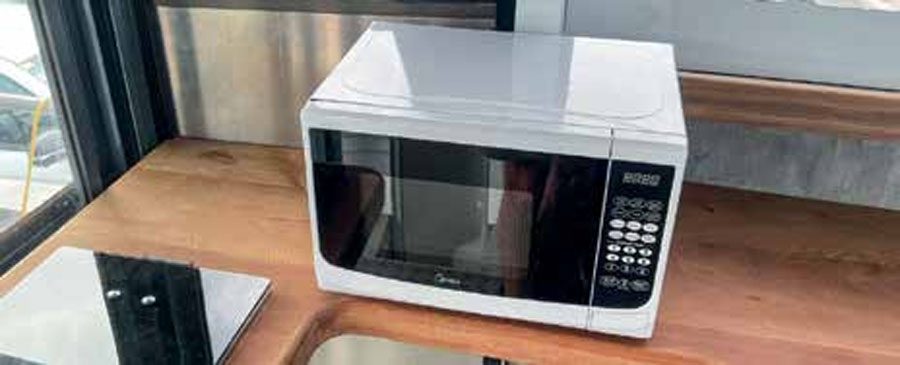
This was borne out when I looked at the pots and pans on my previous launch – after seven years, all my pots still have their original store stickers on them, apart from the well-used frying pan and kettle. So, they have never been used and therefore a single gas burner really is all I need. The other requirement for overnighting is a small microwave, run from an inverter off the house battery. Those two will satisfy all my onboard cooking needs.
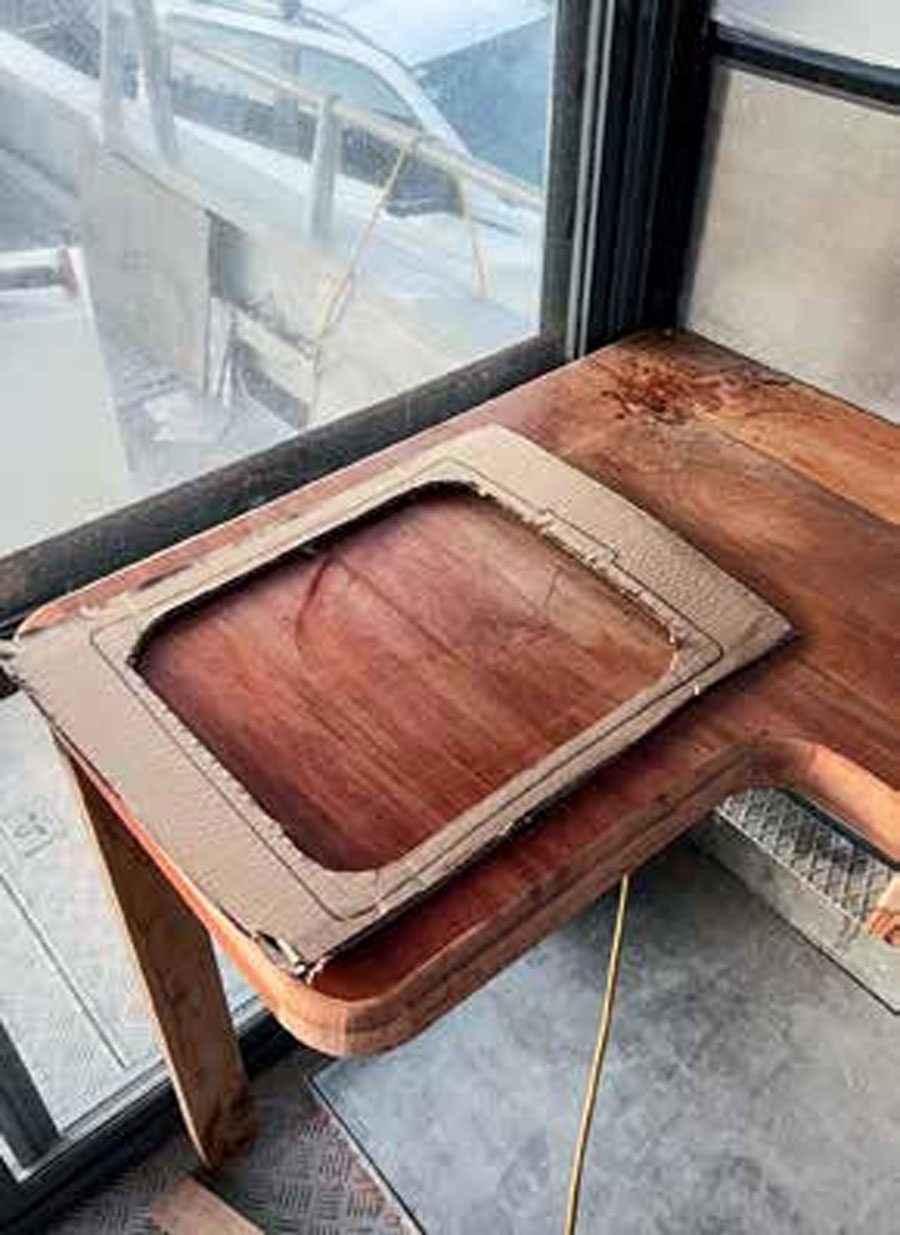
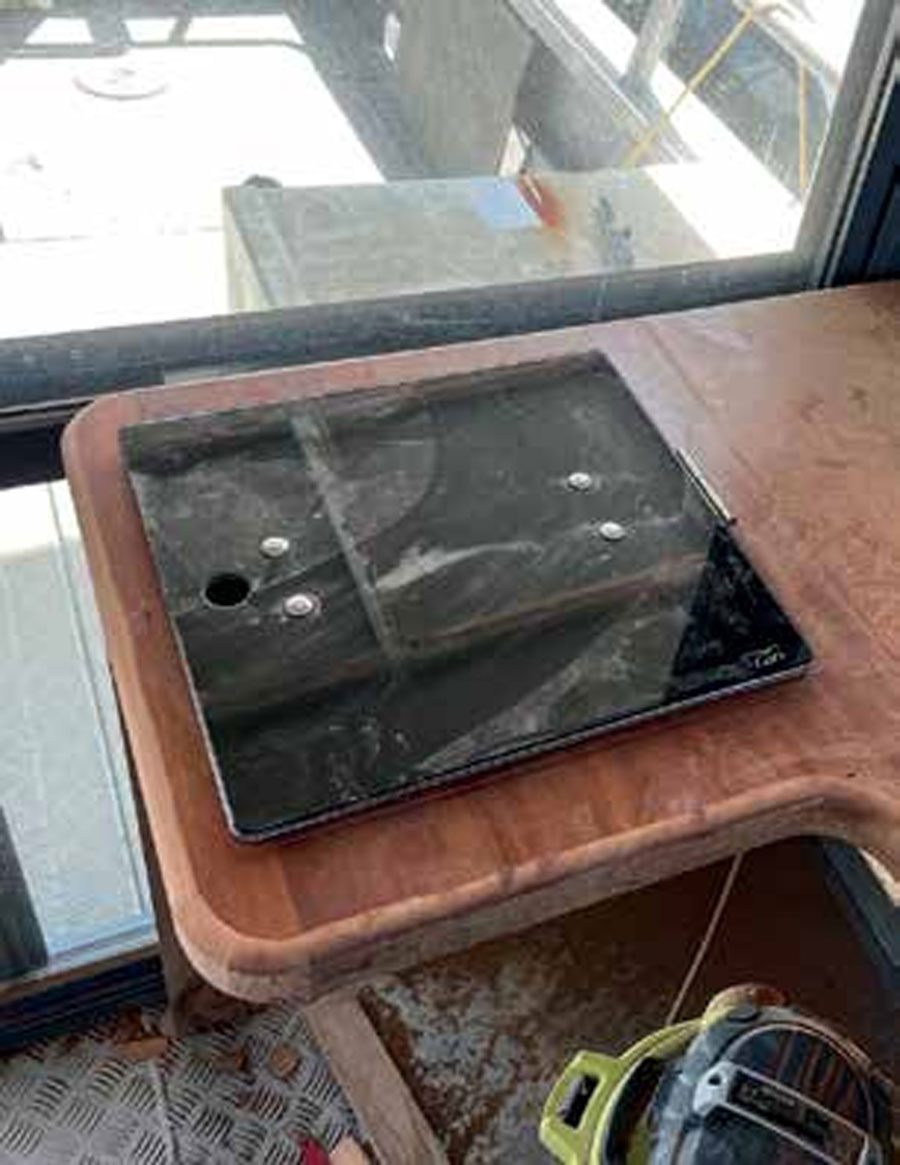
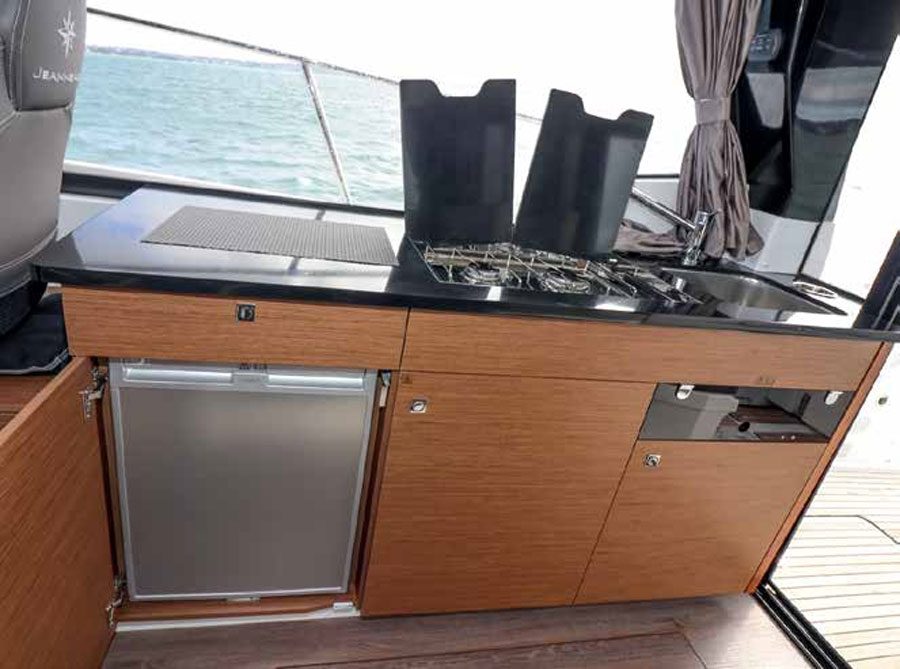
The elegant solution to these needs (a sink with flush-fitting lid, single hob, minimal counter ‘footprint’) is a combined hob and sink unit. Several combinations are available but the one I wanted was where the hob literally folds away into the sink. I first saw this concept some years ago on a boat I was reviewing, and I loved the tiny space required and the simplicity of the design. Once I had recovered my boat and knew I would be rebuilding the galley I started trying to locate the exact unit I wanted.
Absolute Marine supply several Italian-made CAN brand combination sink-and-hob units, as well as the popular Dometic brand. These all have stainless steel sinks and burners, many with tempered glass lids. They come in a huge variety of shapes and sizes, with single, double and triple burners, and their website lists several options including the round version of the hob-in-sink style I was looking for.
This was not quite what I wanted but I decided to go into Absolute Marine’s showroom in Auckland’s East Tamaki to see if it might do. I was delighted when I got there to find that they also had the rectangular model LV1710 in their showroom display. However, this was their very last unit, so it took some negotiating to get them to agree to dismantle their display stand and sell that one to me. Measuring just 35cm by 32cm, it takes the barest minimum of counter space and was ideal for my design.
The microwave was no problem, since a small domestic unit would suffice. I had a 3000-watt inverter ready to install, so I sourced a tiny but practical 700-watt microwave from one of the big box retailers.
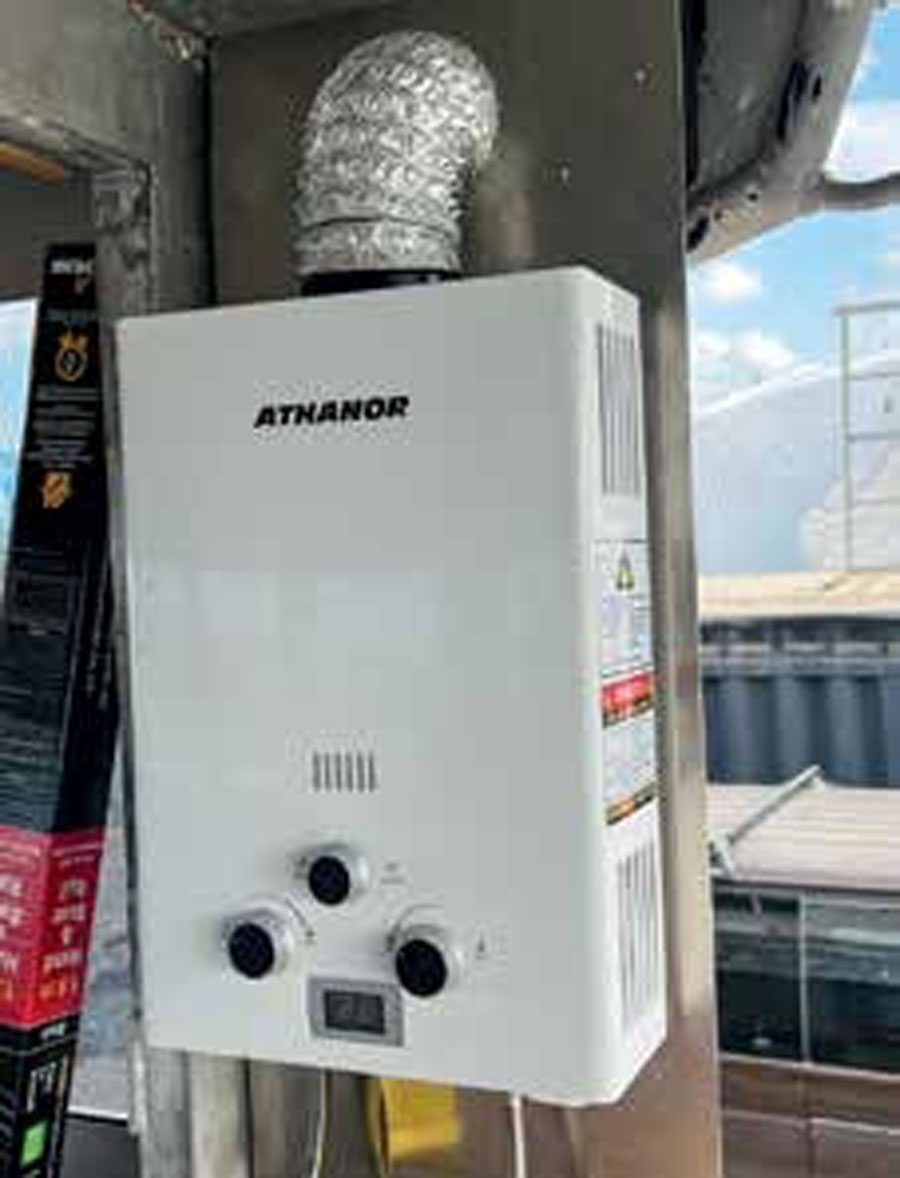
The next major component I needed was a solution to provide hot water, and a gas hot water heater known as a califont seemed to be the best solution here. Since the cabin sides are aluminium, I would mount this directly against one of the exterior walls and vent the hot exhaust gases out a suitable duct and grille just below the roofline. My chosen site has no ceiling lining or any material other than aluminium in close proximity, and there’s a flow of fresh air close to the base of the unit.
Sourcing the califont itself was again not a major issue, with numerous options available from most marine suppliers. One legal and safety consideration was the gas supply, for both the califont and the hob. All gas hoses need to be installed by a licensed gas fitter, and the cylinder itself needs to be directly vented outside the cabin. Based on my previous launch, I knew that the gas requirements for a weekend away, even with six or eight people on board, was pretty modest. I therefore purchased a small 3kg gas cylinder and appropriate regulator. And the last item required was a freshwater pump with a pressure-sensitive switch, so it will switch on when a tap is opened and switch off when the tap is shut again.
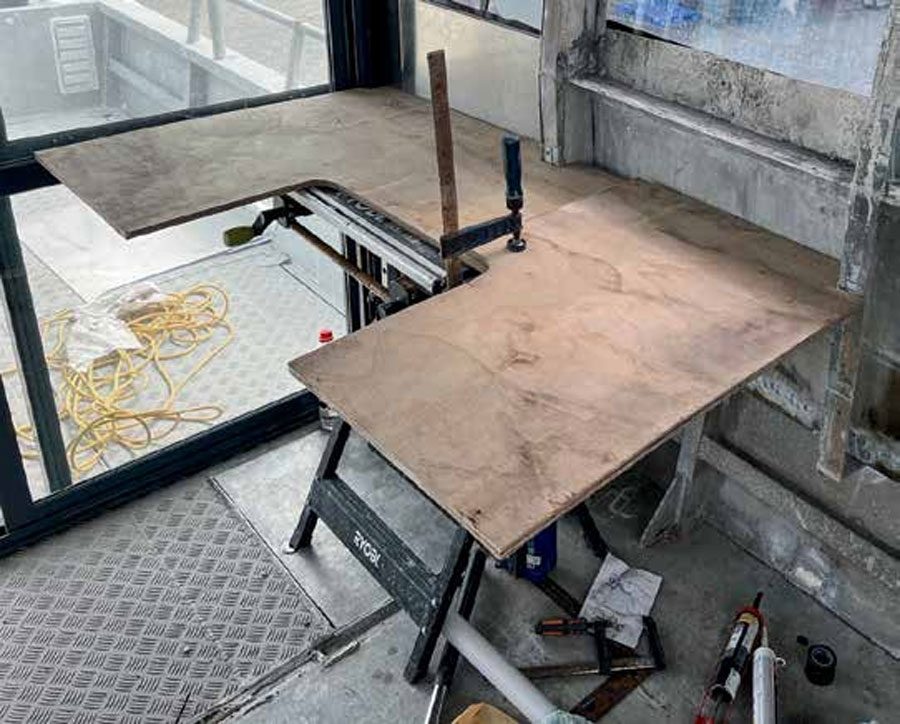
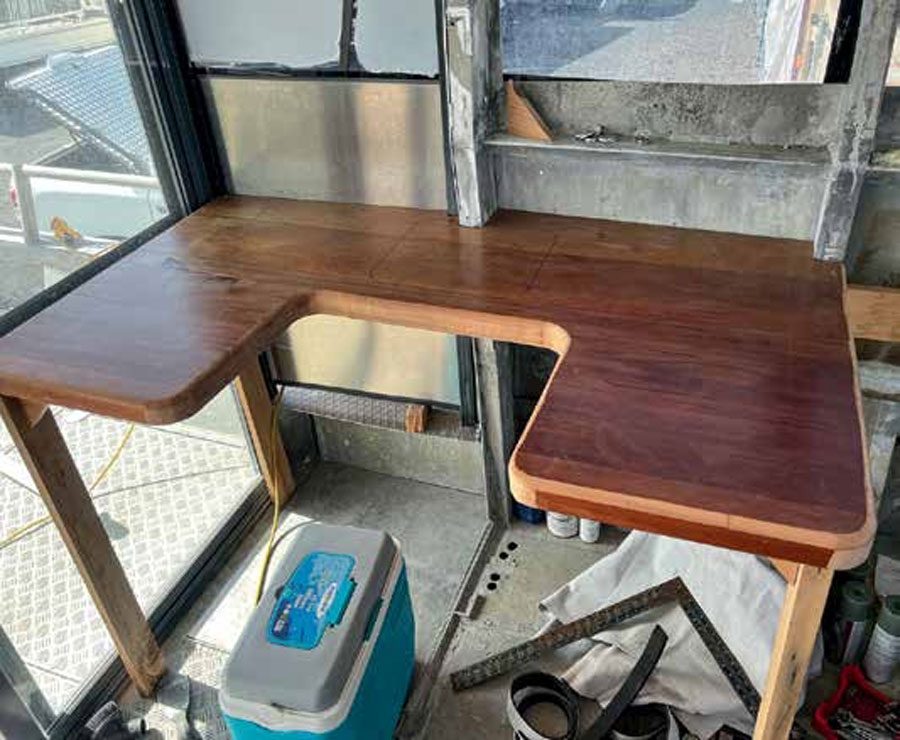
Now to put it all together. My large rimu countertop, mentioned last month, was cut to shape, and had the back edge carefully shaped to fit snugly against the cabin side. This required cut-outs for the roof support pillars, as well as accommodating the angled cabin side while keeping the whole unit square to the centreline. Once I had the U-shaped counter in place, perched on some temporary legs, I could plan the utility fit-out.

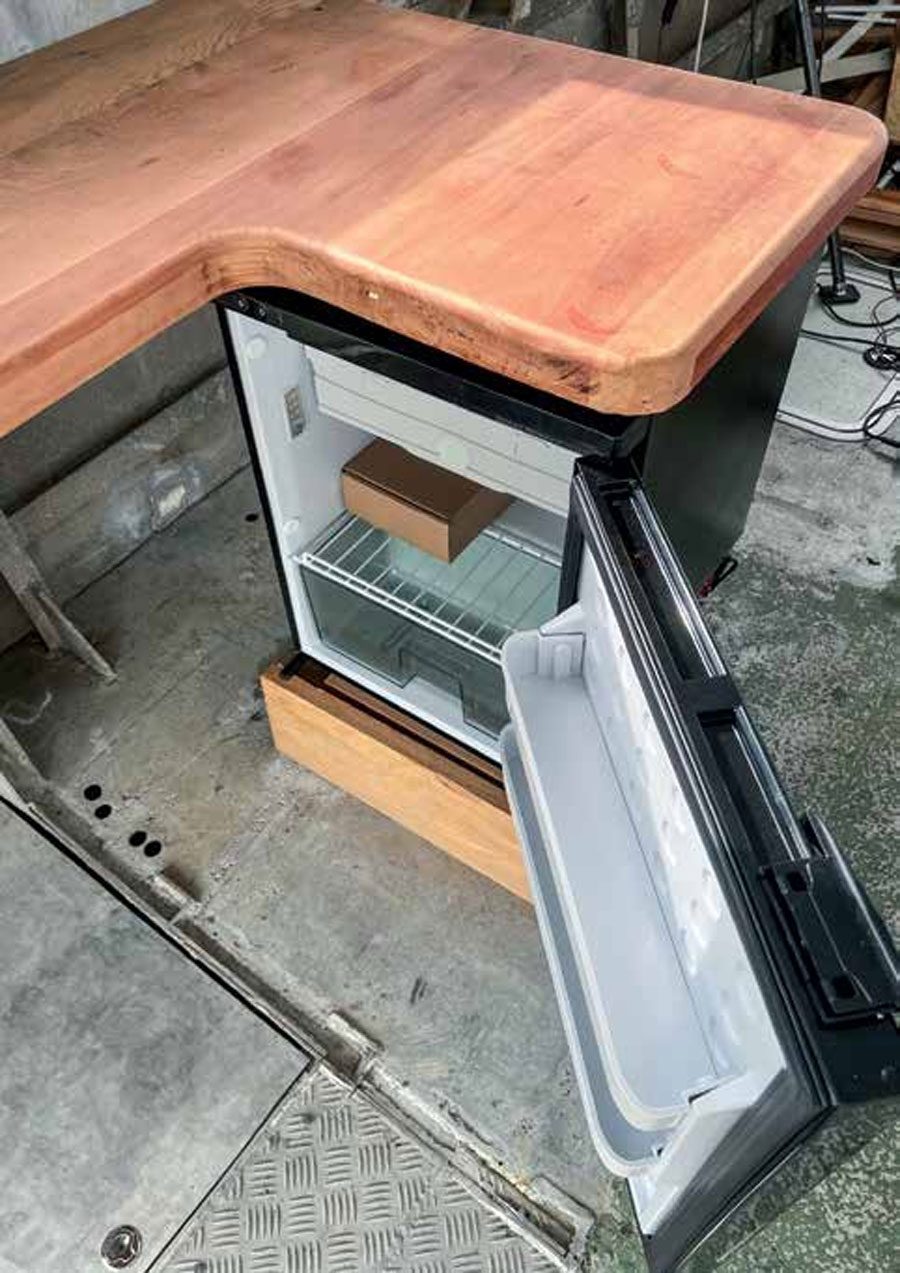
Here I had to juggle things slightly, due to the position of the hull’s access hatch in the floor below, and the roof pillars against the back edge of the galley area. Ideally, I wanted the sink to be in the centre of the U-shape, but a pillar was in the way. Instead, it had to go on the left, with the hob opening outwards. As it turns out the logo on the hinged cover faces the right way in the configuration, so looks like it was meant to be. This puts the fridge under the counter on the right, in case we need to use the hull access hatch underneath on the left at any stage.
I carefully crafted a cardboard pattern for the sink hole, then used this to cut through the countertop with a multitool. After sanding the hole, I trial-fitted the sink as well as the position of the fridge under the counter. Everything felt ‘right’, so I could now create a carcass for the cabinet. Like everything in this project, I had made things difficult (a hatch under the cupboard), but I plan to build a pivoting corner cupboard in the corner which solves multiple issues.
The califont was attached to the aluminium wall on the opposite side of the cabin, and a heatproof duct was fitted to the vent. Plumbing was fiddly but easy – Buteline plastic pipe and fittings are very easy to install as long as you buy (or hire) the correct crimping tool. I won’t cover the details of the installation as that would be boring to read but suffice to say I spent a ‘fun’ weekend playing at being Bob the Builder, cutting sections of plastic pipe and clipping them together. There were multiple trips to the hardware store to buy new pieces of Buteline or additional fittings as I corrected mistakes and discovered better ways to route the pipe.
In the end I had one inlet pipe (from the still-to-be-installed freshwater tank), and that splits into three pipes – one to the califont for hot water and one each to the cold water side of the shower and the sink. The hot outlet from the califont then splits into two to feed the hot water inlets for the shower and sink. The pump with pressure switch is on the single inlet pipe, so turning on any tap in the sink or shower triggers the pump.
The gas cupboard will be positioned next to the shower. Note that best practice is to install the gas cylinder completely outside the cabin, but this is not practical for my layout. Instead, the compartment will be made airtight from inside the cabin but will vent through the exterior cabin wall. I will need to get a gas feeder hose from there under the deck to the hob, as well as up to the califont. However, that job will be deferred until I can get a gasfitter to install it for me. BNZ