When lockdown leaves you with too much time on your hands, it’s good to dive into an arcane woodworking skill like marquetry. By Norman Holtzhausen.
Marquetry uses various types of wood veneer to create pictures or patterns. This is suitable for furniture – or even a picture to be hung on a wall. The timbers’ different colours and textures deliver detailed and beautiful pictures. Repeated geometric patterns also create a simple but luxurious custom-look on otherwise mundane furniture items.

Marquetry differs from ‘inlay’ in complexity and extent. Marquetry typically covers an entire surface, whereas a veneer inlay is usually a smaller, cut-out area created to accept the inserted segments of material.
For example, a channel may be cut along the edge of a table for an inlay of a contrasting coloured wood. Inlays may also use other materials, such as paua shell, while marquetry always involves wood veneer.
A quick Google search reveals some stunning marquetry patterns, and online kits, are available for small projects. But quality veneer is not cheap – and some woods become quite brittle when cut thinly, so it’s not something to undertake lightly.
![]()
The grain also makes its tricky to cut the veneer accurately, especially if you’ve chosen a complex pattern. Fortunately, those small imperfections can add to the character of the finished product, rather than detract from it.
Having seen an inlaid dining table on a superyacht a few years ago, I’d always wanted to try my hand at something similar. My venerable old launch’s wooden saloon table had acquired a fair bit of ‘character’ over the years. The initial plan was to sand the blemishes out and re-varnish it but having started the process I discovered it wasn’t solid wood.

Instead, a thin veneer surface had been laid over a somewhat less attractive substrate. By the time I’d removed the blemishes I was into the underlying wood – and it looked even worse!
Maybe I should make an entirely new table? But it had curved and raised edges which looked too hard to replicate. I considered re-veneering the surface and found a suitable oak veneer online. But when it arrived I realised I’d mis-read the description – it was several smaller pieces rather than one large sheet.
Since joints would look strange in a single-colour overlay, I realised I would achieve a more pleasing result by establishing a pattern with contrasting woods. Marquetry 101!
I found some very thin beech plywood at a model shop which nicely complemented the oak, and I discovered it also took a stain very nicely, which gave me an alternative colour option. And it was also available in whatever quantity I needed.

Having started looking for veneers online I couldn’t resist a couple of parcels of smaller quantities of mixed woods. Pretty soon I’d assembled quite a range, including dark woods like mahogany and light ones like ash.
Now that I had all the colours I needed, I worked out a repeating pattern to cover most of the surface. To create it I first fashioned a template from 1/32nd aluminium sheet. With it I could quickly cut multiple copies of different woods. In the centre I planned to set my boat’s logo – Kitkat – based on the chocolate.
LOGO
The repeating pattern was the easy part and I soon had all the pieces. Next, I had to cut out the letters and other parts of the logo – and the project stalled. It was obvious this would be slow going, with every single piece requiring the meticulous printing of a pattern, transferring the outline to the veneer, then cutting it carefully by hand.

The process then had to be reversed to cut out the inverse shape from the background pattern pieces, and all within a millimetre or so of accuracy. A laser cutter could have done the job, but a decent one was prohibitively expensive. It was clear this would require a ‘month of Sundays’ to do by hand, and I shuffled the parts into a box. The table was returned to the boat, unfinished and unvarnished.
And then along came lockdown, and magically I now had a month of Sundays (more or less) of sitting at home. In the meantime I’d also acquired a low-budget CNC vinyl cutter for another project. These operate like an inkjet printer but with a blade rather than a printing head – it’s a simple way to create stencils.
So the project was revived and I briefly snuck down to the boat (“just checking everything is ready for four weeks of lockdown, sir”) to retrieve the tabletop. I assembled the repeating pattern on the surface, checking that the grain was all running correctly. I used some spray-adhesive to temporarily hold the pieces in place onto a sheet of plastic I’d laid over the surface.
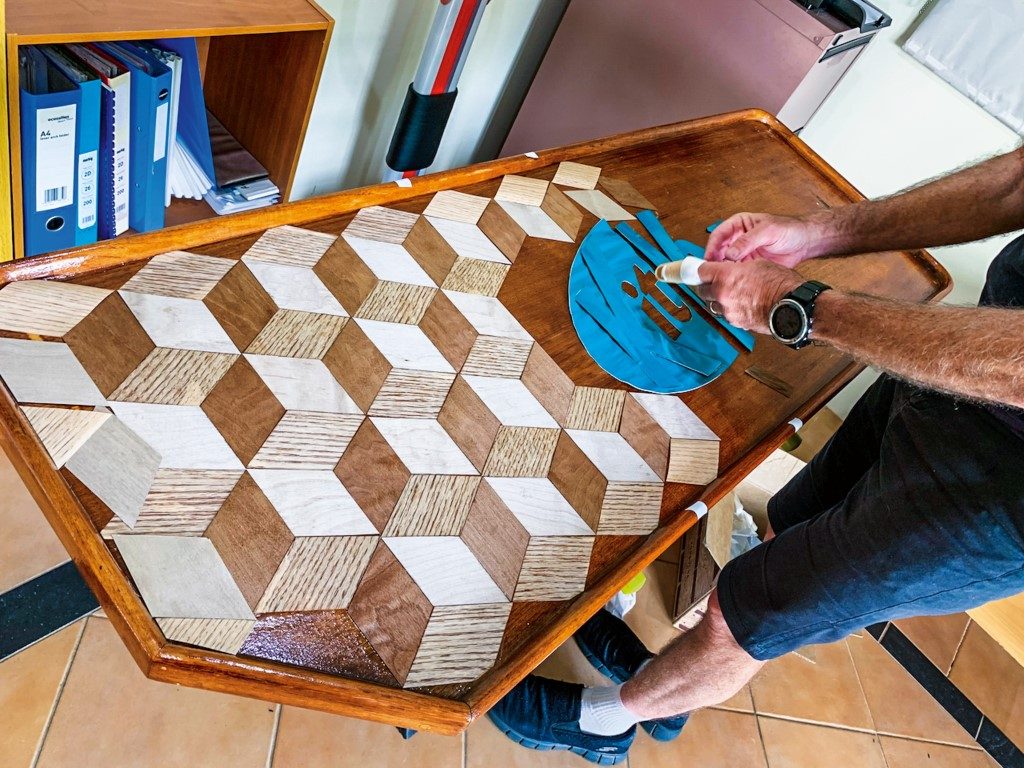
The vinyl cutter was used to cut the logo from some self-adhesive vinyl, keeping both the cutout piece and the surrounding material. I chose suitably-coloured veneers for the two words of the logo and the surrounding ellipse shape.
Given the size of the logo and the smaller sizes of veneer, I also had to work out where the joints within the individual letters would be acceptable, and how best to position them to get the grain running consistently.
After sticking the vinyl to the veneer I began the painstaking process of hand-cutting around the outline of every piece, dealing with the vagaries of hard and brittle wood, grain and texture running in one direction (tending to force the blade out of line), and the desire not to remove any part of my finger.
With all the parts cut out, I trial-laid them over the pattern to preview the finished result. All that remained was cutting out the inverse shapes from the underlying pieces so the logo would not stand proud of the surface. This was going to be tricky with loose pieces – it was time to attach them.
I traced out in pencil the logo’s position in the centre of the table and started epoxying the pattern pieces to the rest of the surface. You need great concentration to get the lines straight and the grain running consistently, and I realised a slow-setting epoxy was best. Also, each piece needed to be pressed down into the epoxy while it set – a box of industrial bolts acted as temporary weights.
With the main part of the pattern in place I epoxied down the elements of the logo, employing the same process to ensure no glue oozed from any of the edges. The last part – very fiddly – was cutting pattern pieces to fit the gaps between the logo and the previously-fixed pattern. Here the reverse part of the vinyl was used to cut the right edge shape and position.

Eventually all the pieces were in place, and it was looking good. A few high spots were sanded slightly, and some visible epoxy was carefully removed with a craft knife.
The final stage was applying ‘liquid glass’ epoxy to the whole table. This is an entire subject in itself, but I had previously used this intensely hard and crystal-clear epoxy and had a couple of litres of it still sitting in my cupboard. Though my saloon table has a raised edge to ‘contain’ the epoxy, when coating flat surfaces you need to build a ‘dam’ wall around the edges to prevent the liquid glass running off.
Using a spirit level to get it all perfectly level, I mixed and poured a couple of litres of the liquid glass over the surface. I spread it around with a spatula until the entire surface was covered in a few millimetres of the product. After leaving it for about 30 minutes to level to a glassy-smooth surface, I quickly passed a blowtorch over the surface to pop any remaining air bubbles. It sets fully hard in about 24 hours.

I am very pleased with the finished result. This is a table that will withstand water and spillages and should be a feature of the boat for many years to come. But there was one drawback: I decided that the old, tatty squabs were no good with the new tabletop, so another $1400 was then spent on getting those recovered.
Who said DIY was cheap?