PLUMBING A TOILET AND HOLDING TANK
Any boat that is going to be used for extended trips will need a toilet of some sort.
For very occasional use, a bucket is the cheapest option, and Burnsco sells a toilet bucket with a suitably shaped seat. The next step up is a chemical toilet, and there is a range of those with removable ‘cassettes’ that make them easier to empty. But there is nothing like the convenience of a proper flush toilet.
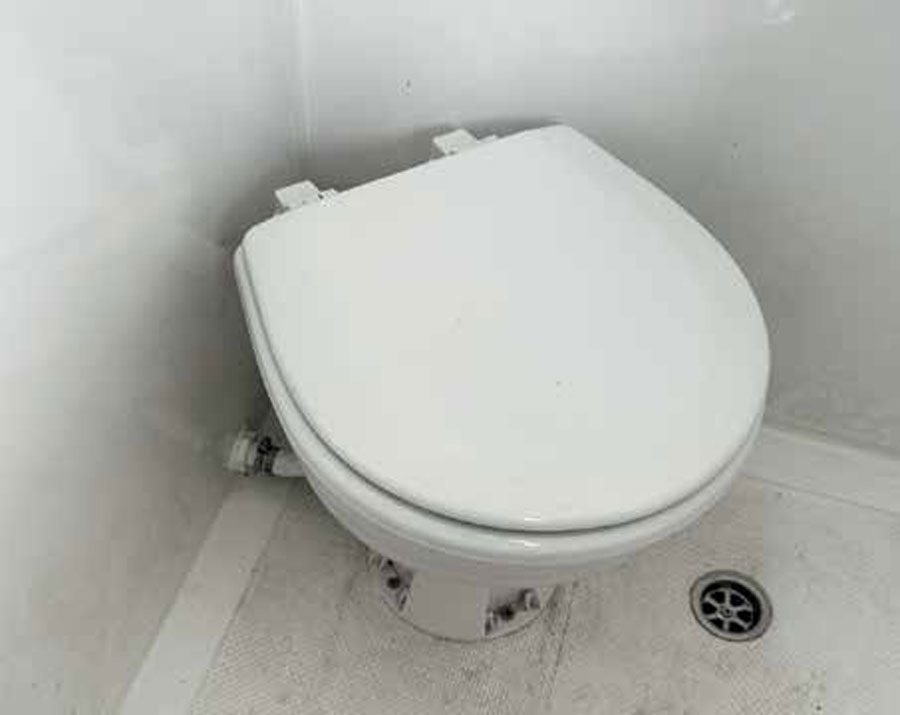
Flush tiolets start at just over $300 for a manual flush with a hand pump and around $450 for the most basic electric flush model. A macerator pump takes care of the waste, cutting it into extremely fine pieces which can then be flushed out into the surrounding water.
Of course, there are rules about when and where you can flush human waste directly into the sea. You must be in water deeper than five metres and more than 500m from the nearest shore or marine farm if you want to flush untreated waste. For most places in New Zealand that means that you cannot flush the toilet directly overboard while in a sheltered anchorage, and most popular fishing spots also fall within the restricted range.
There are two solutions to this problem. The simplest is to install a holding tank. This will temporarily hold the waste on board, and the tank can then be flushed out either when you are far enough from shore, or at the marina’s pump-out facility.
The second option is more environmentally friendly but also more expensive: fitting a sewage treatment system to your boat. Until recently these treatment systems were only practical for relatively large vessels, due to their size and cost. However, they have steadily become cheaper and more compact. There are now a couple of options.
The Raritan Electro Scan is readily available in New Zealand from Lusty & Blundell and costs just over $5000 for the basic unit. Using salt water and 12Vpower, it generates powerful bactericides inside the unit and treats the waste in a three-stage system. This enables the toilet to be used as and where it is needed, and the unit takes about the same space as a moderate sized holding tank.
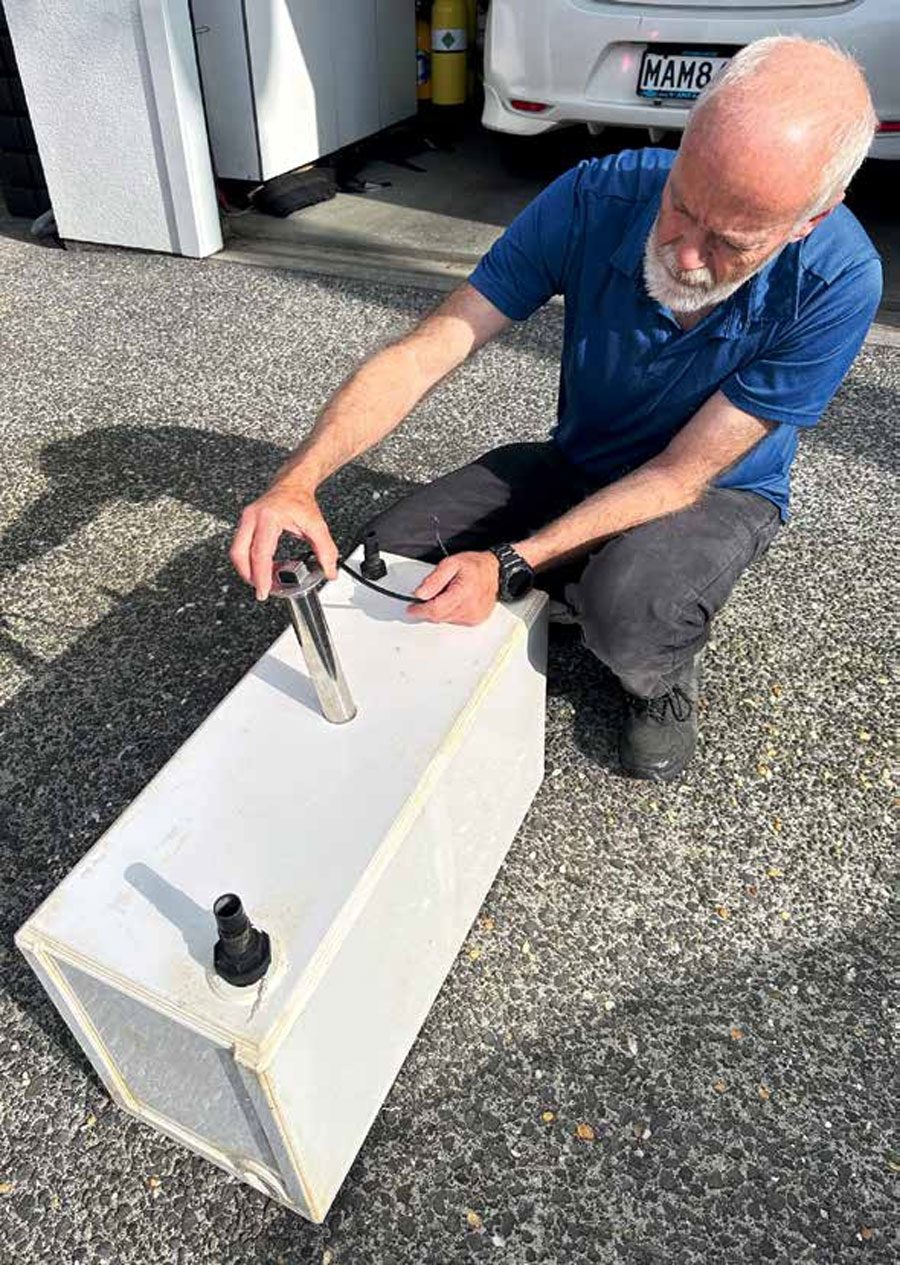
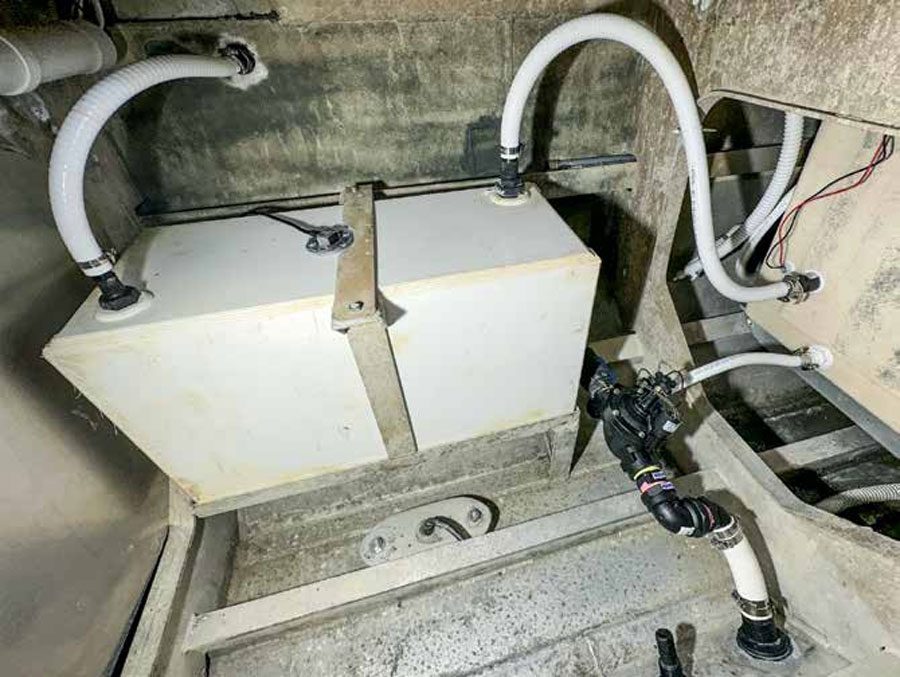
For my boat Divecat, however, I already had an 80-litre holding tank from the original fitout. Being plastic, it was completely unharmed by its time under water and so I elected to install an electric flush toilet combined with that holding tank. There are numerous ways these can be plumbed together, but the simplest is to have the toilet outlet feed straight into the holding tank. The holding tank outlet then empties out to sea through a valve which can be closed when in a restricted area. An 80-litre capacity can cope with a dozen or more toilet operations before needing emptying.
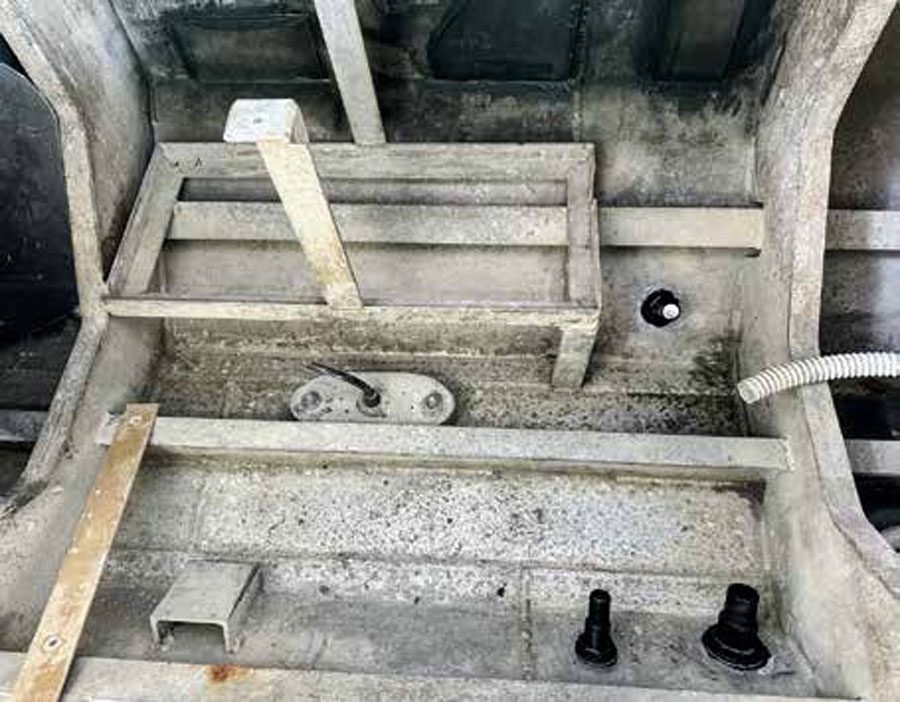
I had already sourced and positioned my toilet, so just needed the appropriate plumbing items to connect everything up. However, I had introduced a new complication – the new toilet location is now below the waterline, whereas previously it was up at deck level. This creates the obvious risk that water can seep past the toilet’s internal seals and eventually overflow, flooding the toilet compartment and potentially even causing the boat to sink.
There are two items that can prevent this. The first are vented loops, something that I have previously installed on the bilge hoses. These contain a small release valve located on the top of a loop of hose that is positioned above the waterline. This valve allows a small amount of air to break the backward siphon action that could otherwise happen with a liquid-filled hose. As soon as there is positive water pressure inside the hose (as happens when the electric pump turns on, or the manual flush is operated), this small valve closes and the hose operates as required.
The second safety feature is a check valve that is closed when the toilet is not in use. During normal operation of the toilet the impeller in the macerator pump acts as a seal to prevent water flowing in, but these are not intended to prevent slow water ingress over a long period of time. Any extra check valve would need to be opened before flushing the toilet and closed again after use.
On many boats a standard part of the operating procedure is ensuring the toilet stop valves are closed as part of the shut-down procedure after a trip. Best practice has these valves located as close as possible to the through-hull fitting, so they can also be used if maintenance is needed on any part of the system.
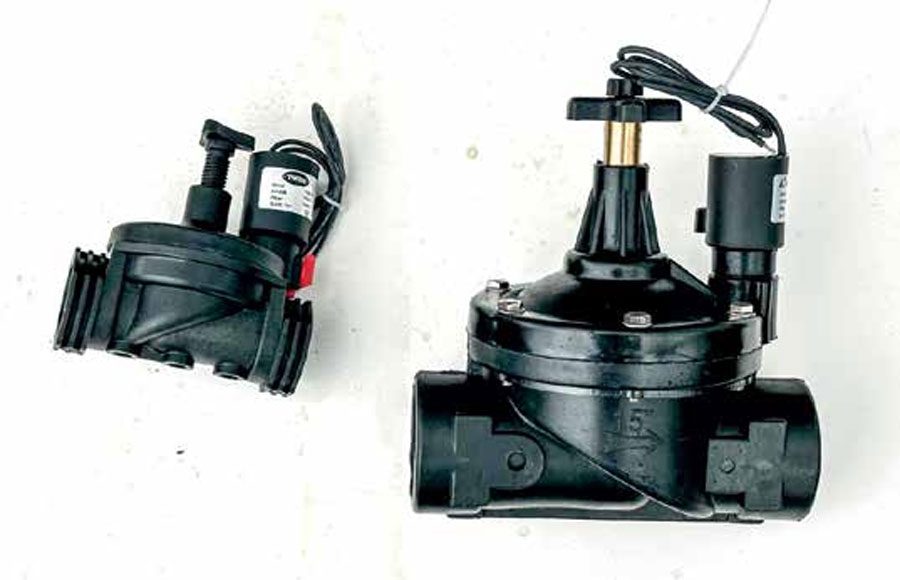
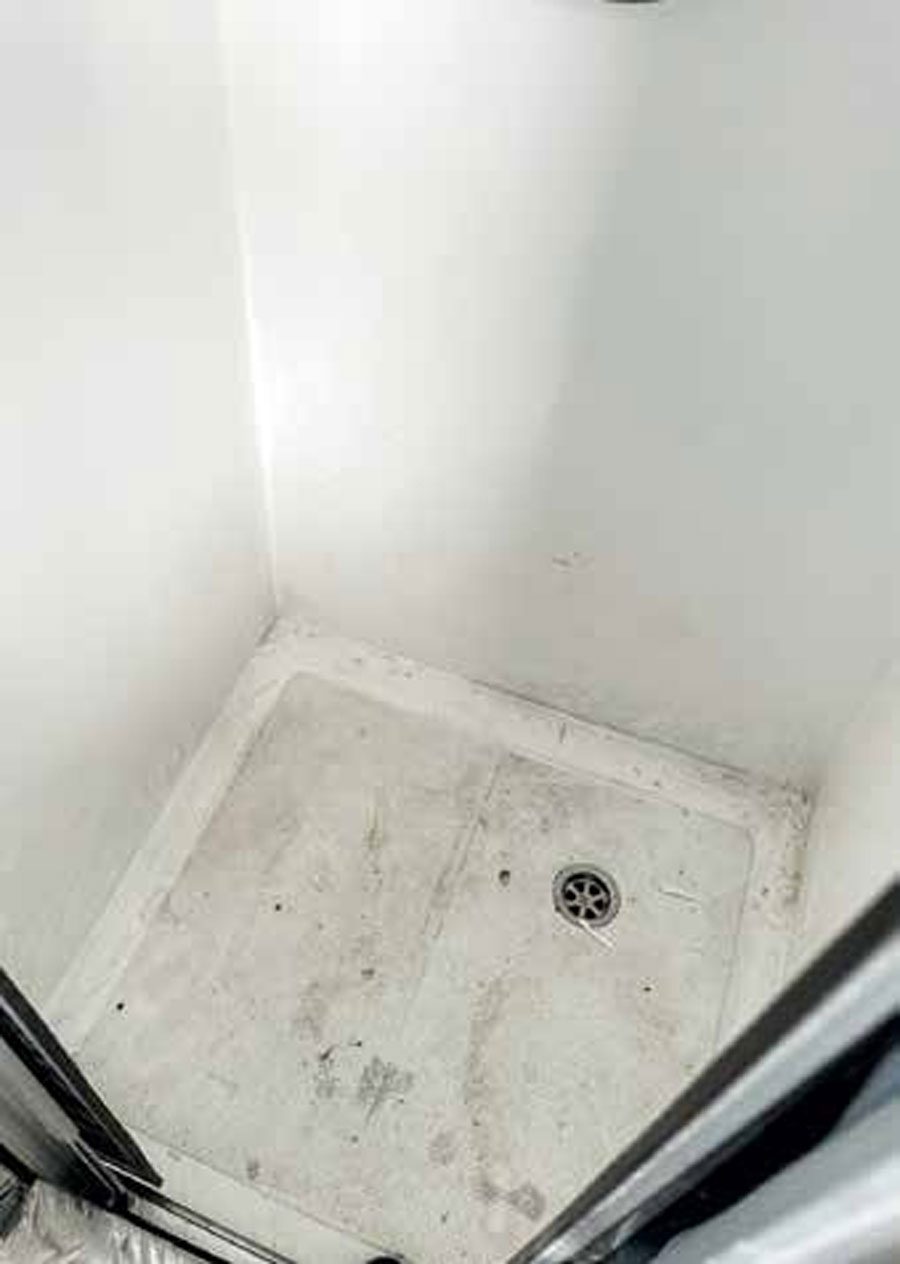
The trouble that I was going to be facing was the location of the toilet and the through-hull fittings. There was very little space inside the shower/toilet compartment to locate a manual valve next to the toilet itself, and having one in the hull void would be extremely inconvenient. A solenoid-operated valve with a failsafe, normally closed mode was required. Fortunately, the hull void where these will be located is inside the main cabin area and so is well protected. This allows me to source solenoid valves that are commonly used by water irrigation systems, rather than requiring a more robust IPx68-rated system. And I will wire the inlet hose solenoid to the same switch as the flush mechanism – when someone uses the toilet and presses the flush switch, that valve will open, the toilet can flush, and the valve will then close again. Only the holding tank outlet valve will be separately controlled so the skipper can decide when and where to empty the holding tank.
On reflection, I decided I did not need both the solenoid valves and the vented loop. For the water inlet side, I would have needed a solenoid-activated vented loop since the air valve operates on positive pressure only. Unfortunately, the water pump on the toilet sucks the water and hence creates negative pressure in the water inlet hose. This means I would need to close the vent for the pump to work.
Solenoid-activated vented loops are readily available but are pricey, and I reasoned that another type of normally closed solenoid valve would provide adequate protection. On the outlet side, the top of the holding tank will be slightly above the waterline and has its own air vent. Hence it provides the equivalent level of protection as a vented loop. So, more stuff needed to be purchased. My final parts list was:
19mm through-hull fitting for water inlet
19mm inside diameter hose for water inlet
19mm solenoid valve for water inlet Electric toilet unit with controls (already purchased)
25mm waste hose for toilet outlet to connect into holding tank Holding tank (already on hand)
38mm waste hose for outlet from holding tank
38mm solenoid valve for waste
38mm through-hull fitting
13mm through-hull fitting for holding tank vent
13mm hose for vent
The holding tank also already had a manual ball-valve fitted directly to it, which I decided to retain as a backup valve. Since I also needed a separate control switch for the holding tank shutoff solenoid valve, I added a waste tank level gauge and integrated switch from Burnsco. This would let me see how full the tank is and let me operate the solenoid valve to empty it when it is possible to do so. Realistically this was the only time I would be able to add a tank-level sender to the holding tank – once a few bowel movements had been through the system I would not be cutting any openings into it!
Of special note is that you must use sanitation-grade hose and fittings. Normal PVC hose may allow odours to permeate through the hose wall – not a pleasant prospect. It is worth paying the premium for this hose and never having to worry about it again. The other safety feature is that all belowwaterline hoses should be double clamped, so that any failure in the hose clamp does not result in water leaking in.
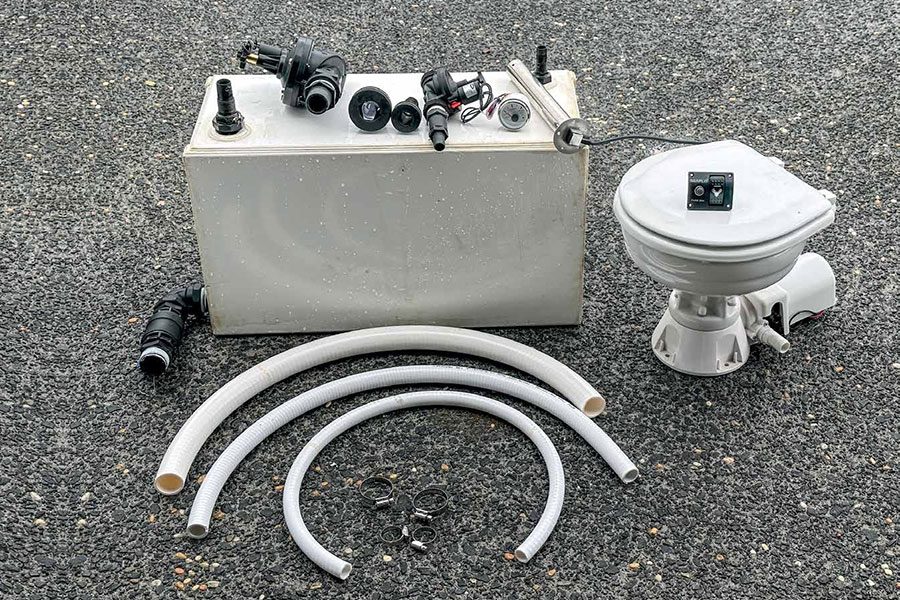
The first photo shows all the equipment ready for installation. I had cut the hole in the holding tank for the sender unit and made use of the opening to fully clean the inside with a water blaster. Installation was a relatively straight forward job, although my muscles were aching by the end of it due to repeatedly climbing in and out of the hatch into the hull.
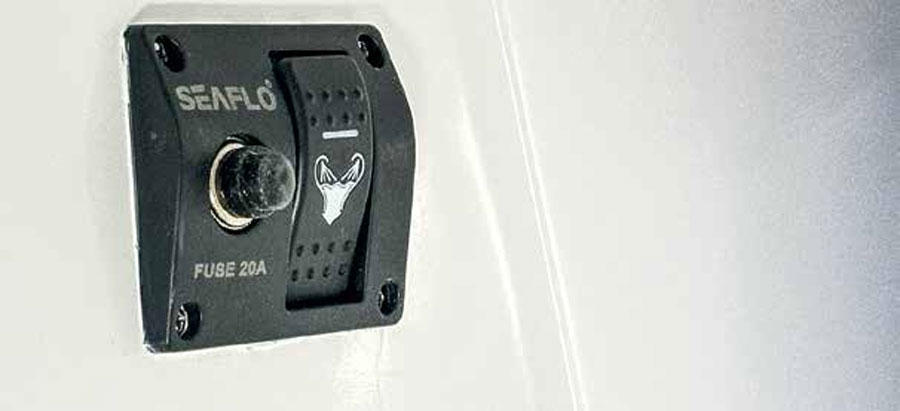
The wiring took a bit longer since I needed to run power for the toilet, and then control cables for the waste solenoid and the tank sensor cables up to the helm. Finally, I could fit the gauge and switch into the dash. A few quick tests and I could confirm everything seemed to be connected. Since the boat is out on the hard, I got a friend to hold a running hose into the water inlet while I tested the flush mechanism and holding tank vent valve (with clean water only – not a real test, but best in case I did find a leak.) All done.
I had some of the components already on hand, particularly the holding tank. If I’d had to purchase everything new for this project the total cost would have been around $1500, based on my size holding tank. Smaller tanks are cheaper. And the job took about six hours to complete, excluding the time to locate the components needed. BNZ